
When I was a kid, my mom didn’t make tacos often. On the rare occasion that she did, we’d have hard shell tacos, with ground meat and a packaged seasoning (you know the one). My mom served it with shredded cheese, lettuce and tomato and called it a day. For the record, I never ate any of the tomato, but I’m pretty sure that I dug taco night. My mom is a fabulous cook, and I learned to be an adventurous eater thanks to her, but tacos were never really her thing. They’re something I learned to really appreciate after I left home.
Fast forward… today I serve tacos to my crew fairly regularly. We usually have soft shell tacos (typically with corn tortillas, but sometimes with flour tortillas), and I serve them with turkey, chicken, pork, black beans, chickpeas, you name it! My kids love tacos any way I serve them, and they especially love DIY Taco Night, when they can fashion their own creations with a variety of fixings.
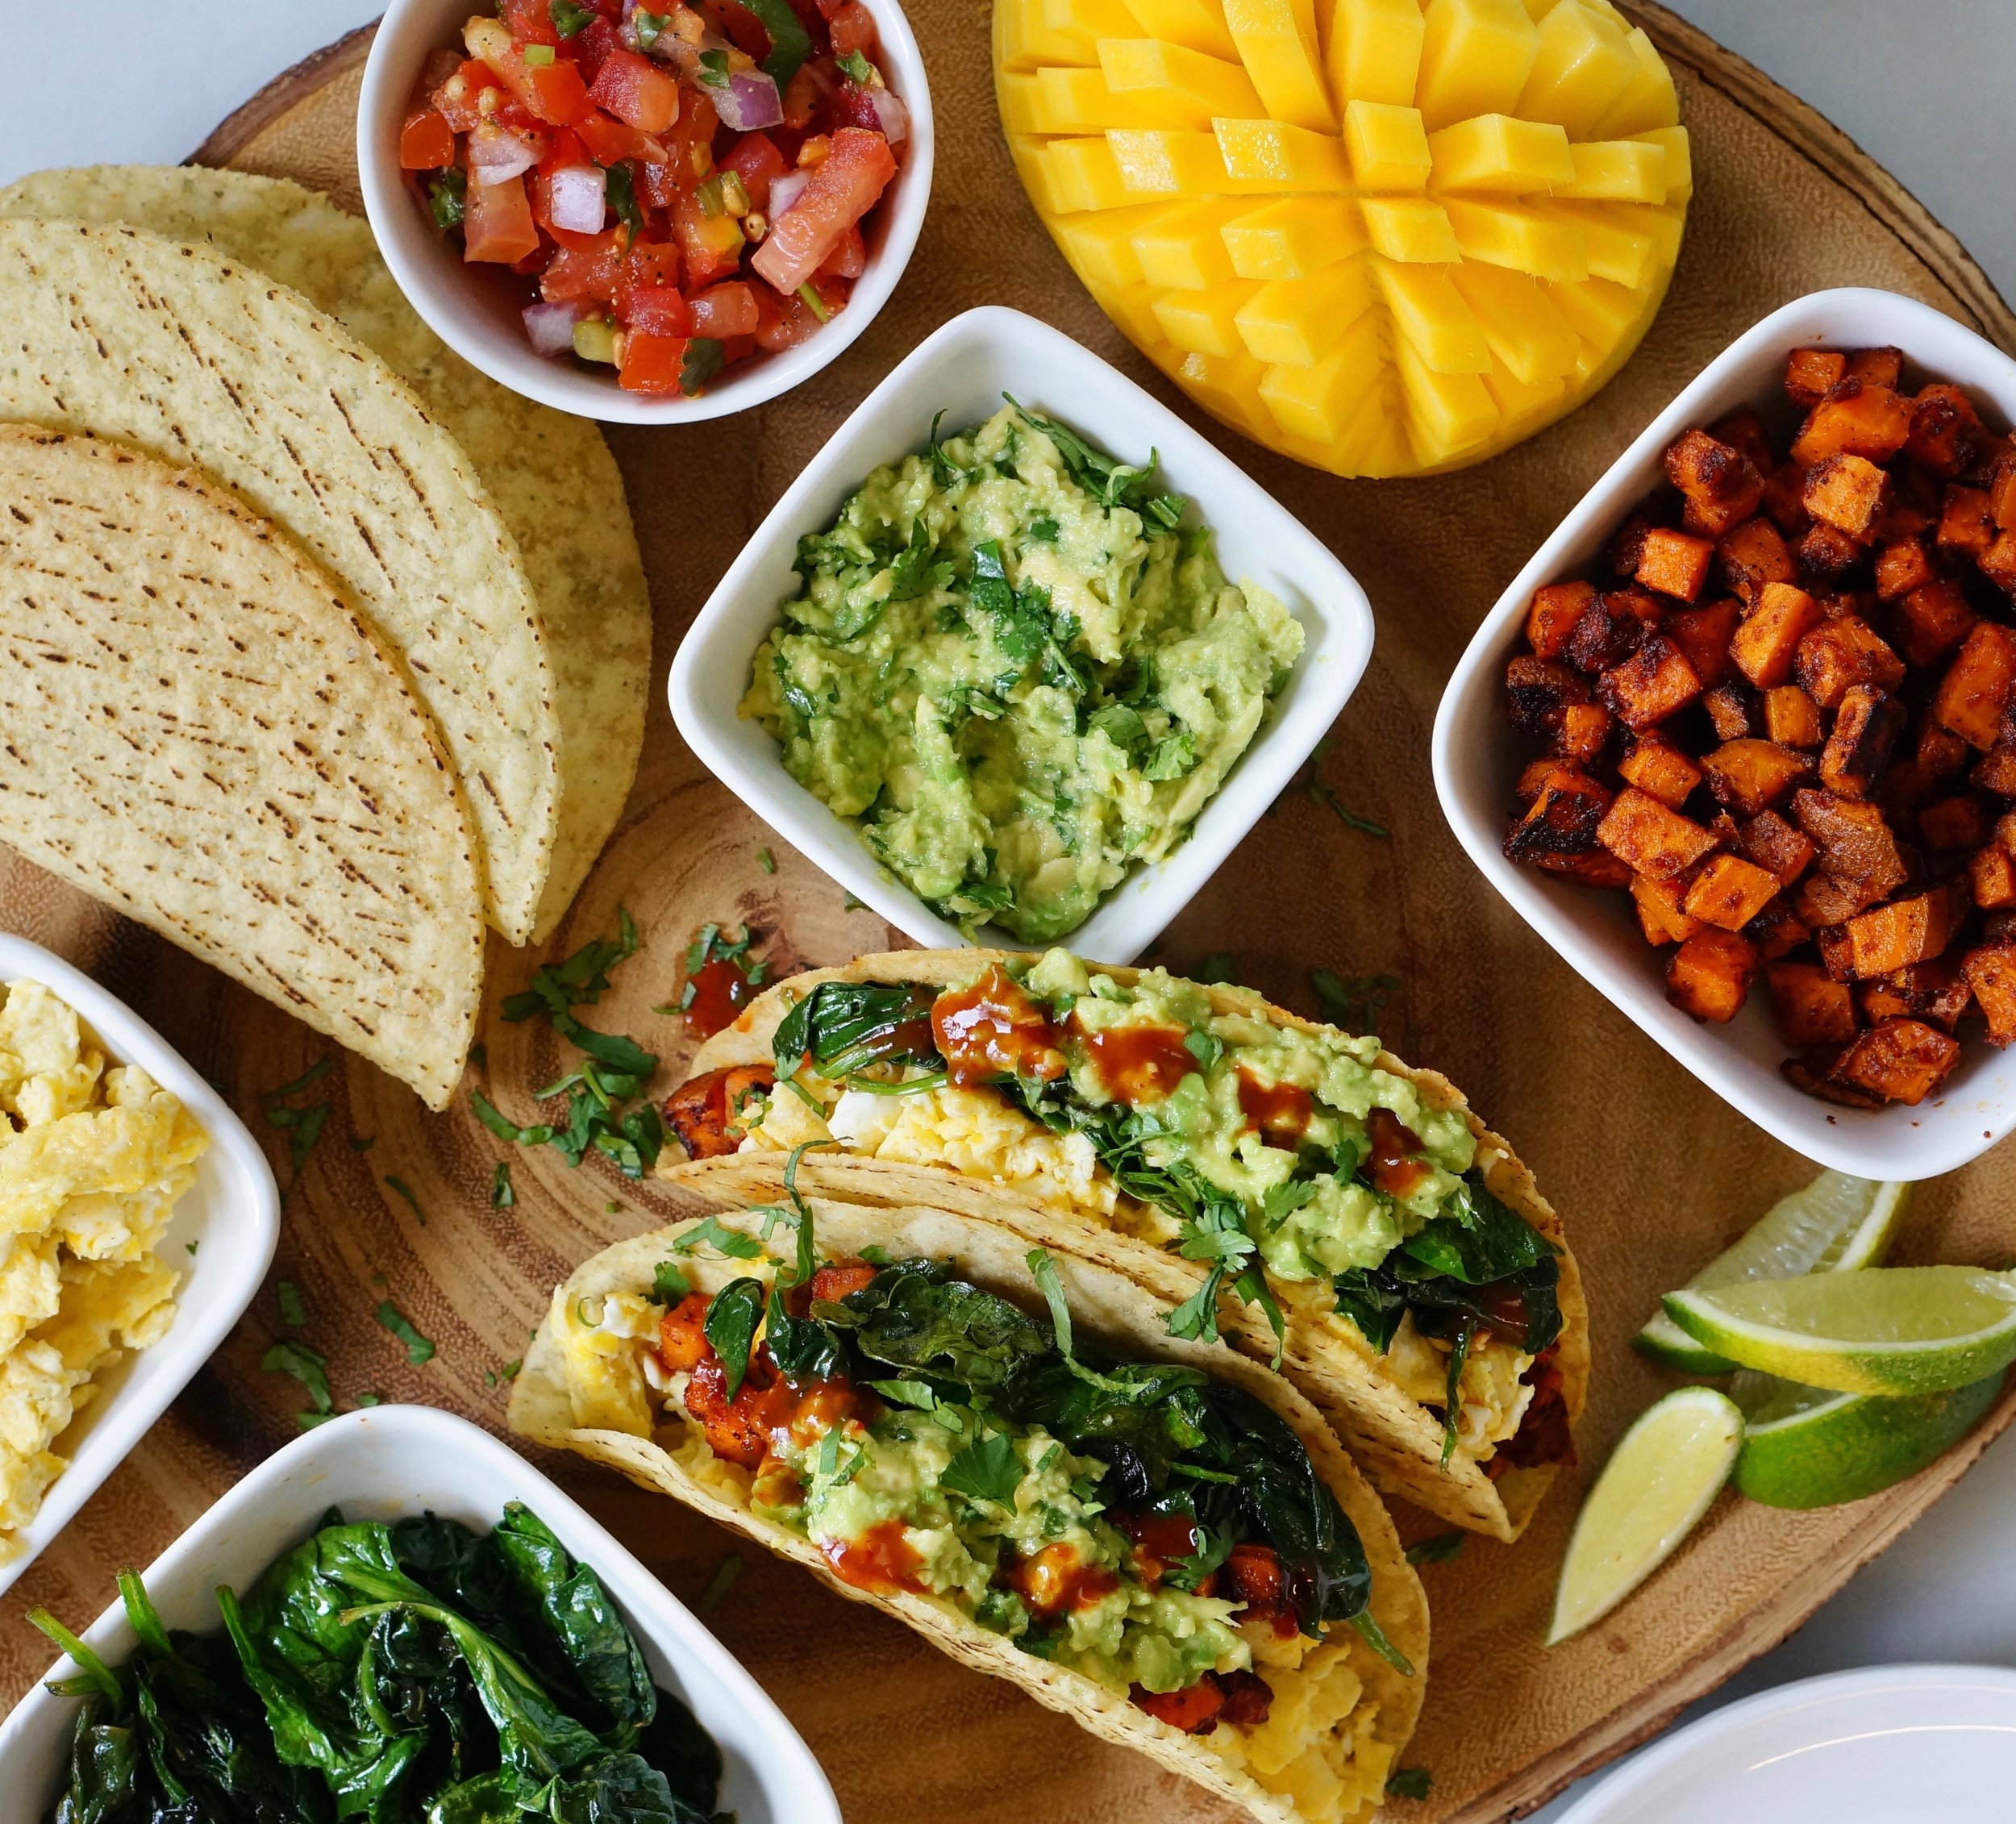
The folks at Siete Foods (whose chips we’re practically obsessed with) sent me a care package that included their new hard shell tacos and a variety of hot sauces (love love love), and the crunch factor added a whole new dimension of fun to Taco Night! I made Sweet Potato Breakfast Tacos, with scrambled eggs, sautéed spinach and a variety of fixings and the combo was a huge win! In a nutshell, it was like eating a spinach omelet with sweet potato hash browns and crispy chips with guacamole, hot sauce and salsa. All good there! It was hilarious watching my kids tilt their necks to make sure they got every last crispy bit into their mouths.
This one will be on repeat at my house, for sure! See below for the recipe.

Sweet Potato Breakfast Tacos
Sweet Potato Breakfast Tacos
Ingredients:
2 medium/large sweet potatoes, cut into 1 inch chunks (skin on)
1/2 teaspoon salt
1 teaspoon garlic powder
1 teaspoon ground cumin
1 teaspoon sweet paprika
1/2 teaspoon dried oregano
4 tablespoons olive oil, divided
8 eggs, lightly scrambled
10 ounces spinach
Suggested fixings:
salsa
guacamole
sour cream
shredded cheese
lettuce
tomatoes
Method:
Preheat the oven to 400 F. Add 2 tablespoons of olive oil to a large frying pan and add the sweet potato. Sauté on medium heat and toss to make sure the olive oil is evenly distributed. Add the seasonings and combine using a wooden spoon. Let that cook for 10-15 minutes until cooked through with slightly browned edges. Place in a bowl and set aside. In the same pan, add another tablespoon of olive oil and lightly scramble the eggs. We prefer them soft, but cook them to your liking. Place them in a bowl when done. In the very same pan (one pan to clean up: victory❣️) quickly sauté the spinach with the final tablespoon of olive oil. Tip: you can add fresh garlic to this if you’d like. While that cooks, heat the taco shells open side down in the oven for 2 minutes. Boom! Dinner is done. ❤️
The only argument we had about this one was whether the sweet potato hash browns should go on the bottom or whether the egg should go on the bottom. What’s your vote? 🤔
This meal is gluten free, dairy free, nut free and vegetarian.
Sweet Potato Breakfast Tacos


