Lentil Curry Soup with Sweet Potato and Kale

I'm knee deep in winter soup obsession. 

I'm pretty sure if there were a log of my cooking patterns, I'd see repetition every January with hearty soups. So when I saw this recipe for Sweet Potato Lentil Curry Soup on Food52 posted by Sarah Kieffer of The Vanilla Bean Blog, I got all kinds of excited. 

Typically, I wanted to make it immediately, but I didn't have exact ingredients, so I made some substitutions. That said, I do plan to make the original recipe and am certain it's amazingly delicious. 

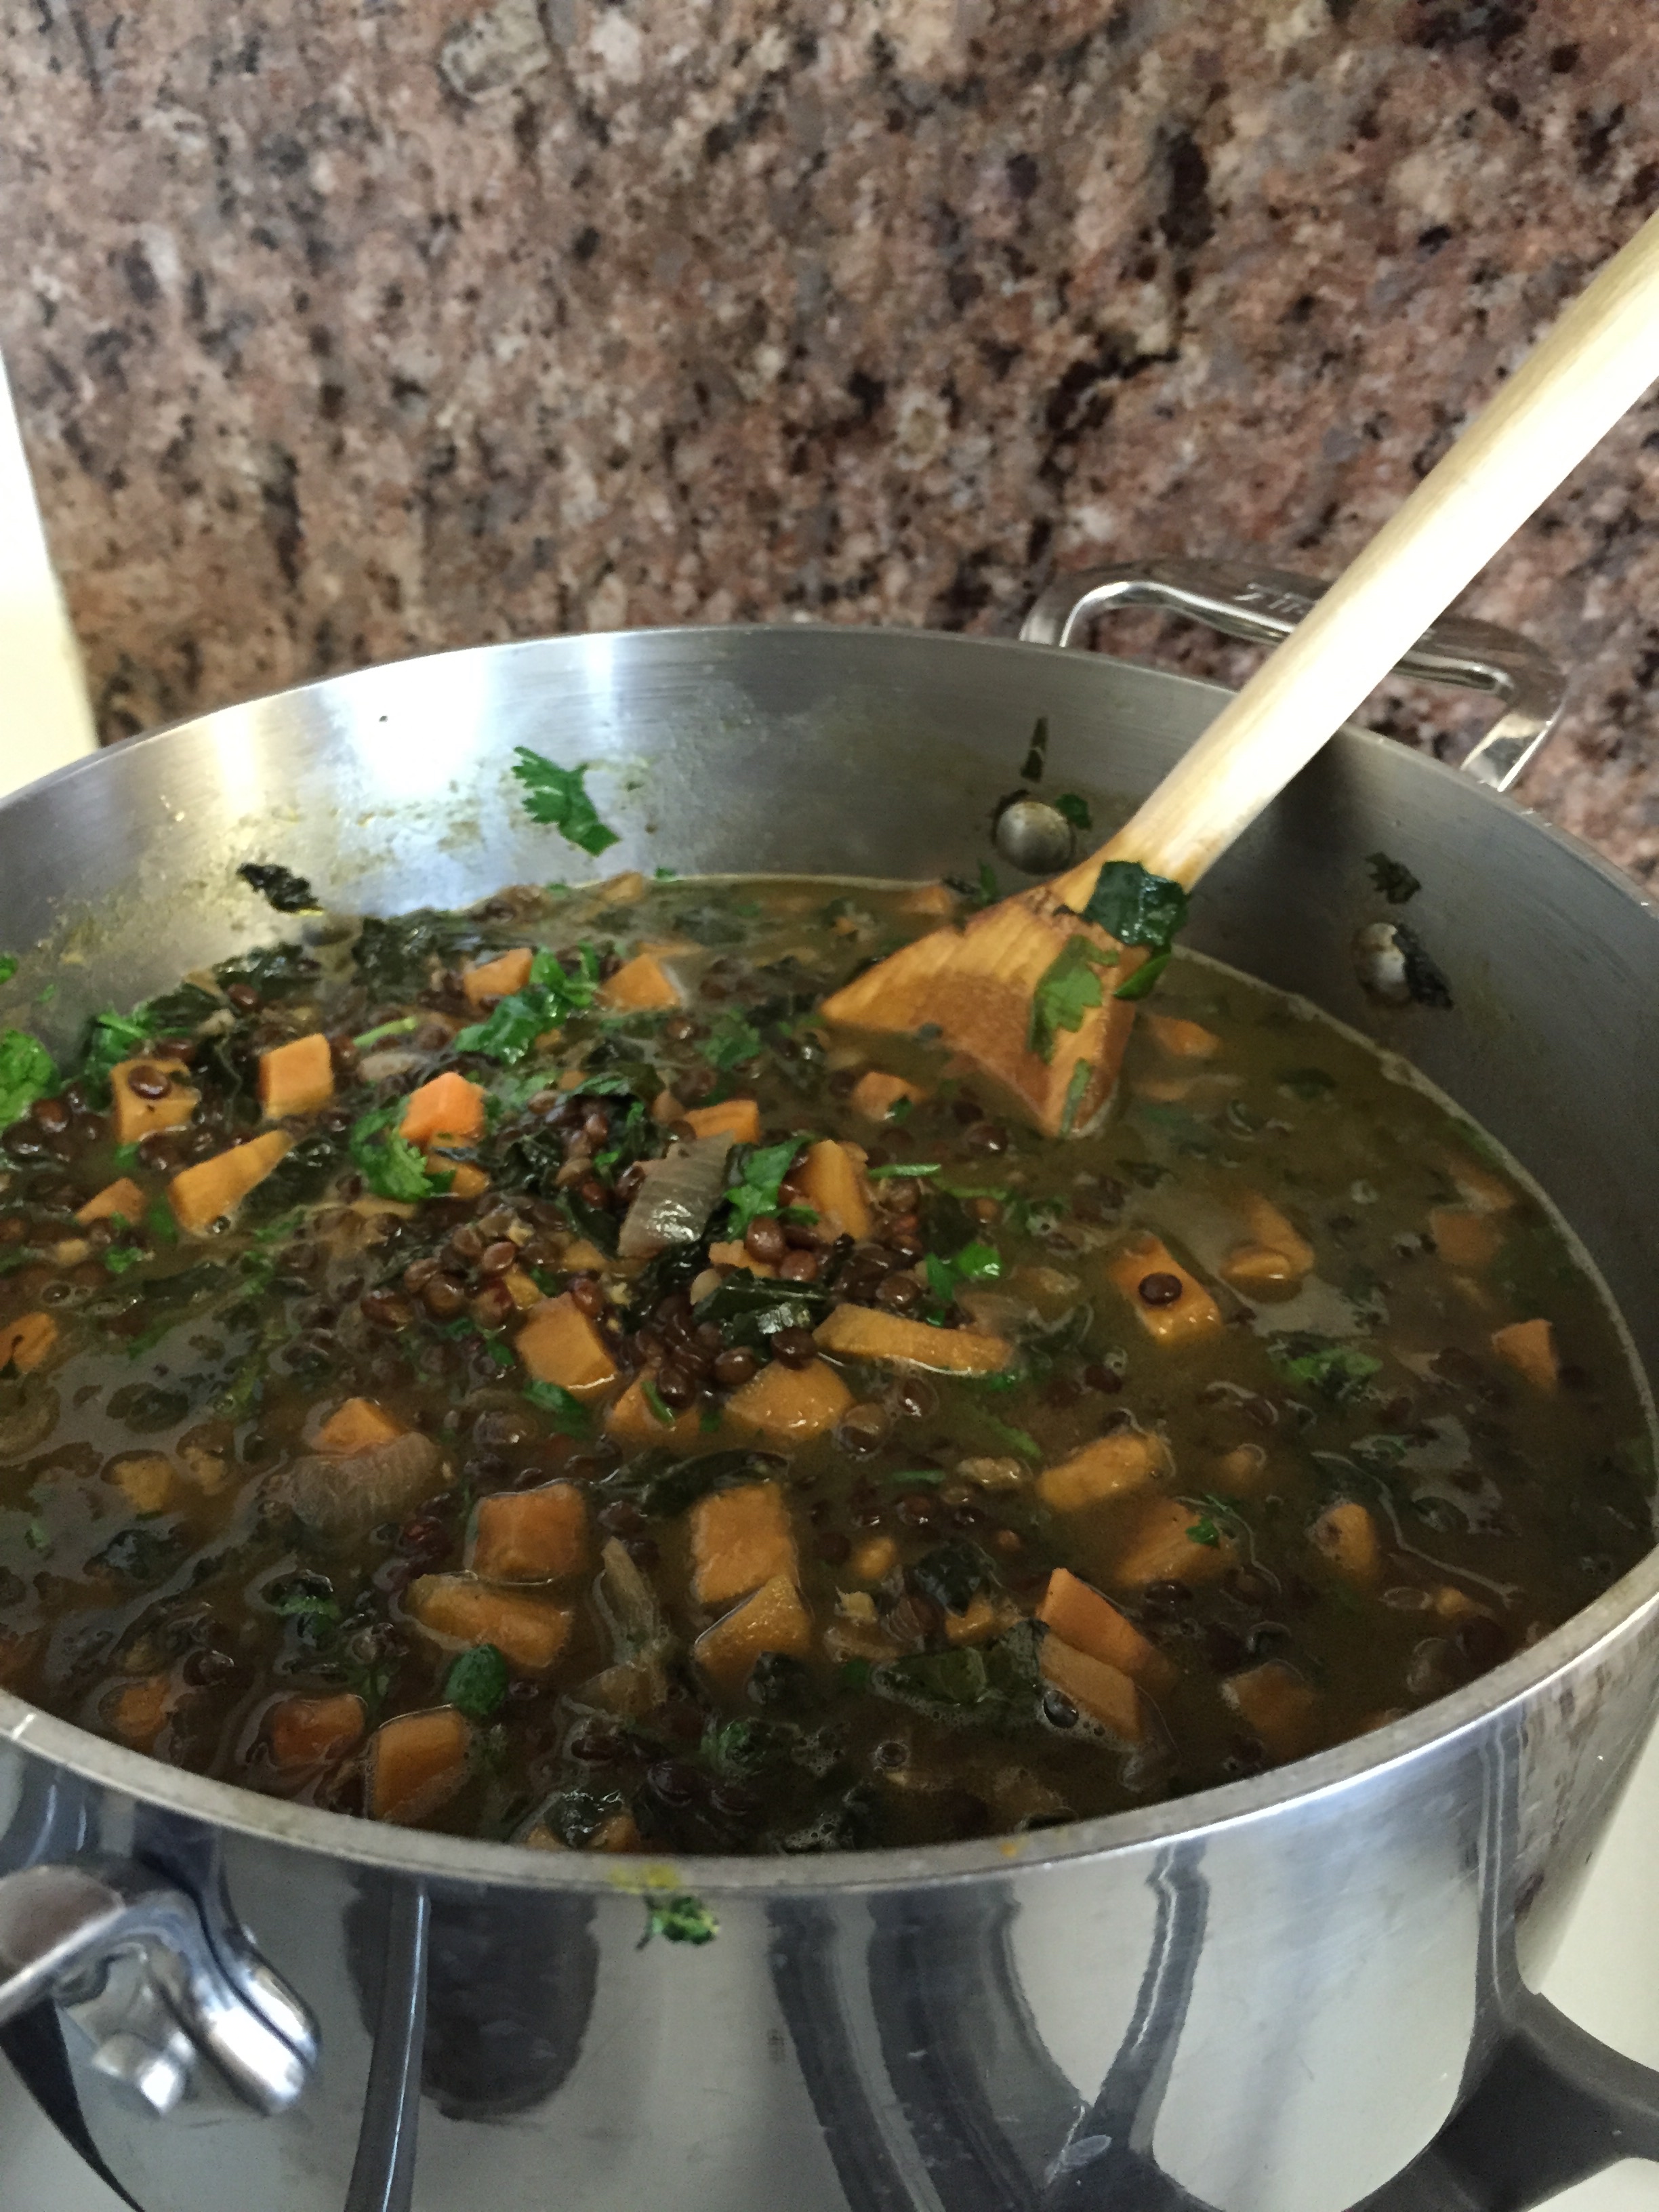
The first change I made was in the lentils; I only had black beluga lentils, not brown. Additionally, I didn't include the red pepper or carrot and I cut the amount of garlic in half and increased the amount of ginger. As long as I was making changes, I figured I'd add the last bit of lacinato kale that was in my fridge. We're all friends here, so I suppose I can admit that I had three bowls of this in one sitting. 

Give this a go! It sure hit that must-heave-hearty-winter-soup spot for us! 

Lentil Curry Soup with Sweet Potato and Kale

Ingredients:
2 tablespoons of olive oil
1 large red onion, chopped
1/3 cup peeled and minced ginger root
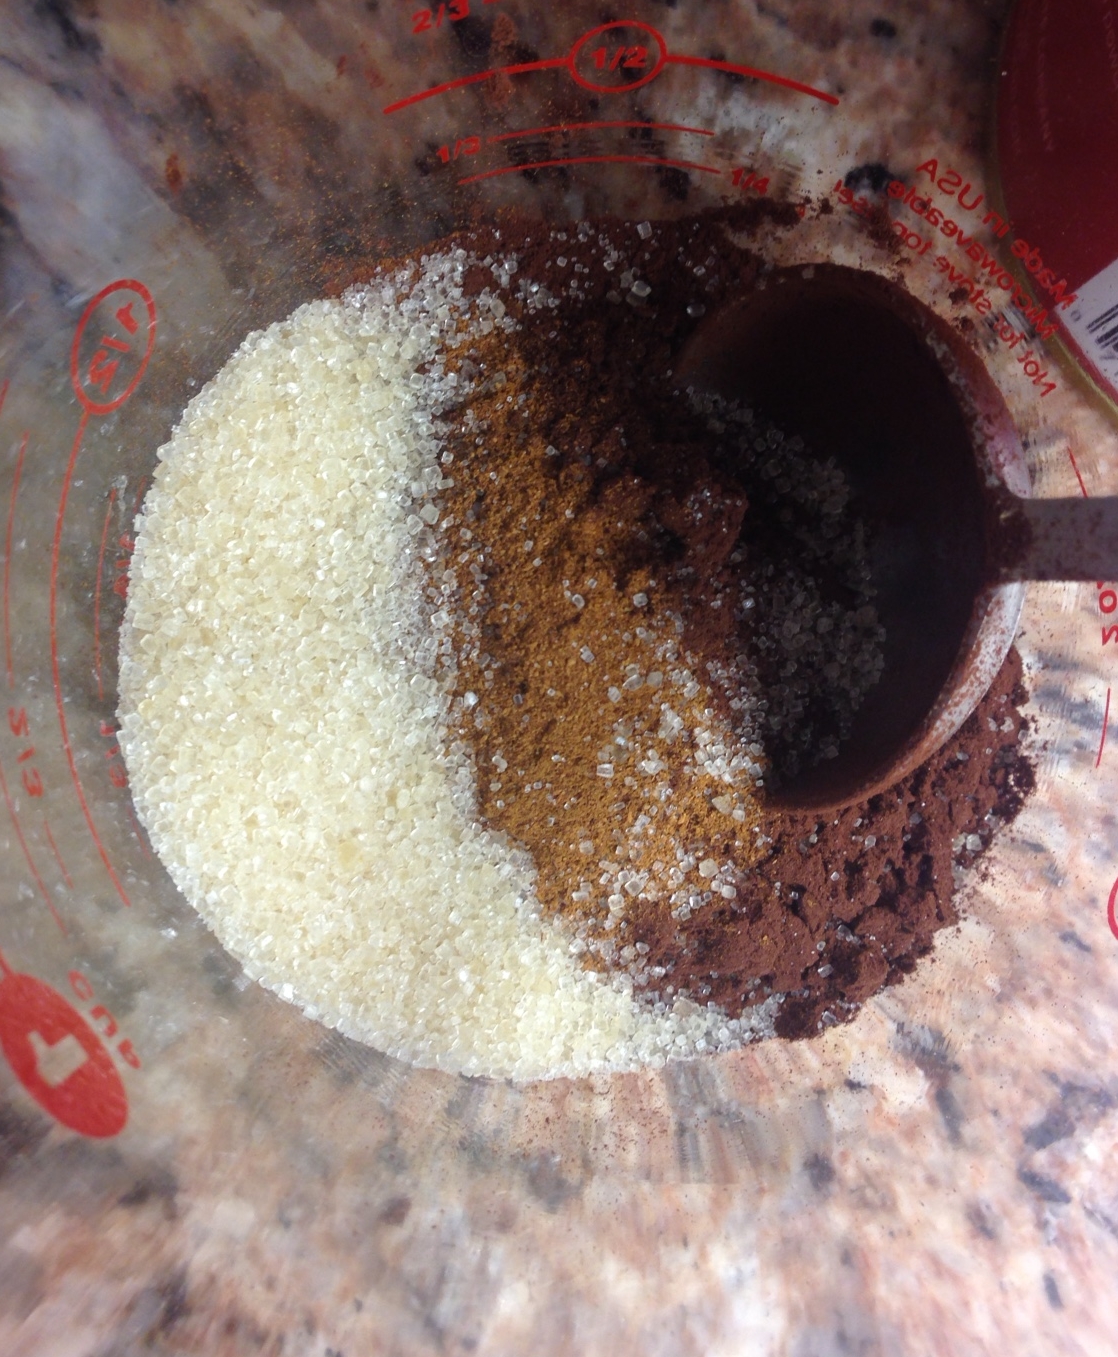
1 1/2 teaspoons curry powder (I used mild) 
1/2 teaspoon red pepper flakes
2 large sweet potatoes, peeled and diced (or roughly 2 1/2 - 3 cups)
1/2 bunch lacinato kale, chopped 
1 14 oz can of coconut milk (I used full fat with the cream)
2 cups black beluga lentils
1 teaspoon salt 
7 cups vegetable stock (or water) 
Juice of 1 lime
1 bunch of minced fresh cilantro
1/4 cup tamari

Method: 
1. In a large pot, saute the red onion, garlic and ginger in olive oil for about 10 - 15 minutes, or until onions are translucent. 
2. Add the curry powder, hot pepper flakes, sweet potatoes and kale. Sauté for 5-8 minutes or until the seasoning has evenly coated the sweet potato. 
3. Add the coconut milk, lentils, salt and vegetable stock. Simmer and cover until the lentils and sweet potatoes are tender, approximately 45 minutes. 
4. Add the lime, tamari and cilantro, stir and enjoy! 

Sayonara, Halloween Candy

Here's the deal in my house: Halloween candy can stick around until Christmas. Yep, that's right. They can have a candy from their bucket once a day if they choose but as of December 25, whatever is leftover is thrown out. Stale. Garbage. I say this because just when I thought I was done with candy for a while, this morning I noticed Valentine's Day decorations and candy everywhere. And next to that? St. Patty's Day stuff. 

Halloween Candy 2014

But back to the Halloween candy... the Candy Fairy takes some of my kids' candy on Halloween night in exchange for a little gift - but that still leaves them with a bucket of candy.  Here's the funny thing: after about November 10, my kids don't even ask for Halloween candy. They're back to their usual dessert/treat requests. (Right now, my kids are all about Cuties, which are mini dairy-free ice cream sandwiches or mango sorbet). 

This year I chucked the Halloween candy on December 24 - a day early - when the stomach bug started to go 'round in my house. (I won't bother with those details, but suffice to say, the last two weeks have not been relaxing). That day, the kids watched me empty dozens of candies into the garbage without a word, as they have in years past, and I wondered - why didn't I do this a month ago? Maybe our Halloween tradition should be October 31 until Thanksgiving? Maybe earlier? 

As I gear up for the Valentine's Day onslaught, I'm thinking about holidays to come... perhaps 2015 will bring a new Halloween candy plan for us.

What's your Halloween/Valentine's candy strategy? 

Dairy Free Peppermint Hot Cocoa

The smell of hot cocoa reminds me of coming in from the cold. My mom used to make the most wonderful hot cocoa when I was a kid. I'd spend hours playing outside and come in to find a hot mug waiting for me on the kitchen table. It was never super sweet and while I have always had a sweet tooth, I never cared for sickly sweet beverages. 

My kids are no different than other kids; they love hot cocoa too. My youngest is dairy free so I bought some coconut milk (unsweetened) so that she can partake in this wintery treat. This morning she tried hot cocoa for the first time and (shocker) loved it! When I told my son that I made the hot cocoa with coconut milk, his first reaction was "eeeeeeew!" But when the moment came for him to drink it, my guy devoured it. I mean, nothing was left over. There was not even a smear of cocoa on the edge of his mouth. Here's the secret: I melted part of a candy cane in the mug. 

This is what we did (and I made this with my kids):
First, we poured 2 cups of unsweetened coconut milk into a saucepan. We put it on the stove on medium high heat.

IMG_0985.JPG

Next, we combined 3 tablespoons of unsweetened cocoa, 1 tablespoon of sugar and 1 teaspoon of cinnamon in a container (I used one with a pouring spout to make my life easier). 

Next we added 1/2 teaspoon of vanilla extract and about a tablespoon of hot water and stirred until there were very few lumps and it looked like melted chocolate deliciousness. 

The coconut milk began bubbling and I took it off the heat. I then poured the chocolate mixture into the hot coconut milk and stirred. There will be white clumps - that's okay. 

I stirred with a whisk and there were still some white clumps of coconut milk skin. When I poured it into mugs, I added a candy cane (somehow we have billions of these in our house) for minty flavor. 

dairy free peppermint hot cocoa

The kids didn't even make it out of the kitchen with these. It's rich and thick and cocoa-y. Yum yum. 

Here's what you'll need (this made enough for my three kids): 
2 cups unsweetened coconut milk 
3 tablespoons unsweetened cocoa
1 tablespoon sugar
1 teaspoon cinnamon
1 tablespoon hot water
1/2 teaspoon vanilla extract
1 candy cane

Wishing you all a festive holiday season and a happy, healthy new year! 


Banana Oatmeal Bars: A Fast, Easy, Healthy Breakfast

'Tis the season to be hectic. 
I don't know about you, but amid all of the awesomeness of the holiday season, I'm just pooped. Truth be told, my husband and I are relieved when the kids want cereal with milk and a banana or toast with a banana for breakfast these days. My kiddos choose their breakfasts and lunches in advance, which certainly makes things easier for me because I don't have the added stress of thinking about what to serve (let alone dealing with an argument about it). That said, I still have to prepare and serve those meals and unfortunately, there are no holiday fairies that take care of that for me. 

It's times like these that make Banana Oatmeal Bars so very amazing. 

LaLa Lunchbox banana oatmeal bars

These things are so easy to make, my kids do it themselves now, which frankly is one of the greatest holiday gifts ever. One batch makes 9 bars in our house – but it can make 16 more if you cut them smaller. My kids generally eat two apiece with breakfast. With just four ingredients, they're simple to prepare, quick to serve, and full of healthy goodness. Trifecta! In fact, putting two of these on a plate with some fruit is even easier than serving a bowl of cereal with milk. These bars also make for wonderful snacks! They're dairy free, gluten free, vegan and naturally sweet thanks to those super ripe bananas. 

Download the image below and add it to your LaLa Breakfast Food Library and/or your LaLa Lunchbox Food Library so that your mornings are just a teensy bit easier. Feel free to reach out with any questions you might have about that. 

Banana Oatmeal Bars

LaLa Lunchbox banana oatmeal bar ingredients

3 super ripe (aka brown) bananas
2 cups of rolled oats (not instant)
1 teaspoon vanilla extract
½ teaspoon salt
* optional: 1/2 cup of one of these: dried cranberries, raisins, nuts, pumpkin seeds or chocolate chips

How to:

1. Preheat oven to 350. Line an 8×8 dish with parchment paper.
2. In a mixing bowl, mash the bananas until they are smooth.
3. Add the oats and mix to combine.
4. Add the vanilla extract and salt and mix until the ingredients are evenly distributed.
5. Pour into baking dish. Bake for 25-28 minutes. Let cool for 10 minutes and enjoy.

Here are some other recipes you might like: 
Banana Sweet Potato Muffins
Banjo Muffins
Oatmeal Muffins
Banana Pancake Kebabs
 

Let's keep in touch! Follow us on Instagram, Pinterest, Facebook and Twitter to see what we're up to! 


Yummy Pasta, Made from Beans!

We're not gluten free in my house (we're nut free and fish free and my littlest one is dairy free, but all of that is another story). As an allergic person, I have an affinity for products that are specifically directed to those with allergies or special food needs, even if they aren't catering to my particular needs. 

When I spoke with the folks at Explore Asian, it was clear that while they set out to create products that were delicious, they are also keenly aware of the needs of those who are gluten free, health conscious, vegan and kosher. I fit into one of those four categories (health conscious) and I can say confidently that these pastas are delish. My kids have added this bean pasta to our LaLa Lunchbox Food Library and now we pack it in our school lunches. I struggle with family dinner sometimes, so this has been a welcome addition. 

The first flavor we tried was the Organic Edamame Spaghetti. My kids are big fans of spinach pasta (affectionately called 'green noodles' in my house) so the color of this was an immediate plus. The kids giggled - how can pasta be made with beans and water? These products are 92% beans and 8% water. I find that amazing. No weird fillers! I was initially a little nervous that the texture would be strange and gummy or rubbery but my concerns were unfounded. While it doesn't taste exactly like pasta made from wheat flour, the mouth feel is pleasant in it's own right. 

Explore Asian Edamame Spaghetti

All three of my kids liked this. I gave it a quick toss with roasted garlic olive oil (see below) and my kids added freshly ground black pepper and voila! Dinner was done. These pastas are loaded with fiber and protein - it's like eating a giant bowl of beans with dinner, but with the ability to twirl on a fork! 

A few nights later, I made the Soybean Spaghetti for dinner with my husband (with plans for leftovers for my two year old). Again, the taste and texture were both satisfying. This time, I made the dish with olive oil, homemade roasted red peppers, sautéed snow peas, steamed green peas and salt. We devoured this. 

Explore Asian Soybean Spaghetti

Explore Asian has other flavors (all organic) including Black Bean pasta, Mung Bean pasta, Adzuki Bean pasta and an Edamame and Mung Bean combination. They also make rice noodles, wheat noodles and noodle soup, but I have not yet tried any of those. 

Have you tried the Explore Asian products? If so, I'd love to hear about how you prepare it! 

Here's the deal with that Roasted Garlic Olive Oil: I roasted several heads of garlic recently and followed this recipe. I then mixed the soft, roasted garlic with olive oil, poured it into an ice tray and froze it. Now whenever I want roasted garlic-flavored olive oil, I just pop out a cube. For pasta dishes, I melt a cube into a sauce pan and give the pasta a quick toss, adding veggies or whatever else might be accompanying the dish. It is typically ready to plate in about 3-4 minutes. 

If you're interested in changing up your dinner game, or adding more variety to your school lunches, check out:
Our 2016 lunch resolutions
Fall/Winter 2016 lunches
Quick Weeknight Meatballs
Our favorite lunchboxes
Easy Spinach Pie
 

** full disclosure: Explore Asian sent me these pastas to try but I have not been compensated to write this post.