Homemade Crayons. Seriously Easy.

I'm a crafty kind of person. I love hands-on art projects with my kids but admittedly, I don't like things to get *too* messy. A daunting-seeming cleanup will make me shy away from an awesome looking art project in my house. I have three kids and a business - there's really only so much cleaning up I can muster in a given day. 

So when I came upon this make-your-own crayon project on Pinterest, it seemed exactly up my alley! Not only did my kids make their own multi-colored crayons, they made use of those tiny bits of crayon that usually turn up under the couch and then get tossed into the garbage. Economical and creative all in one! 

Want to make your own crayons? Here's how:

1. Gather a large pile of crayons, peel them and put in a pile on a cutting board. The peeling can be tedious but it's worth the effort. 

crayon1.JPG

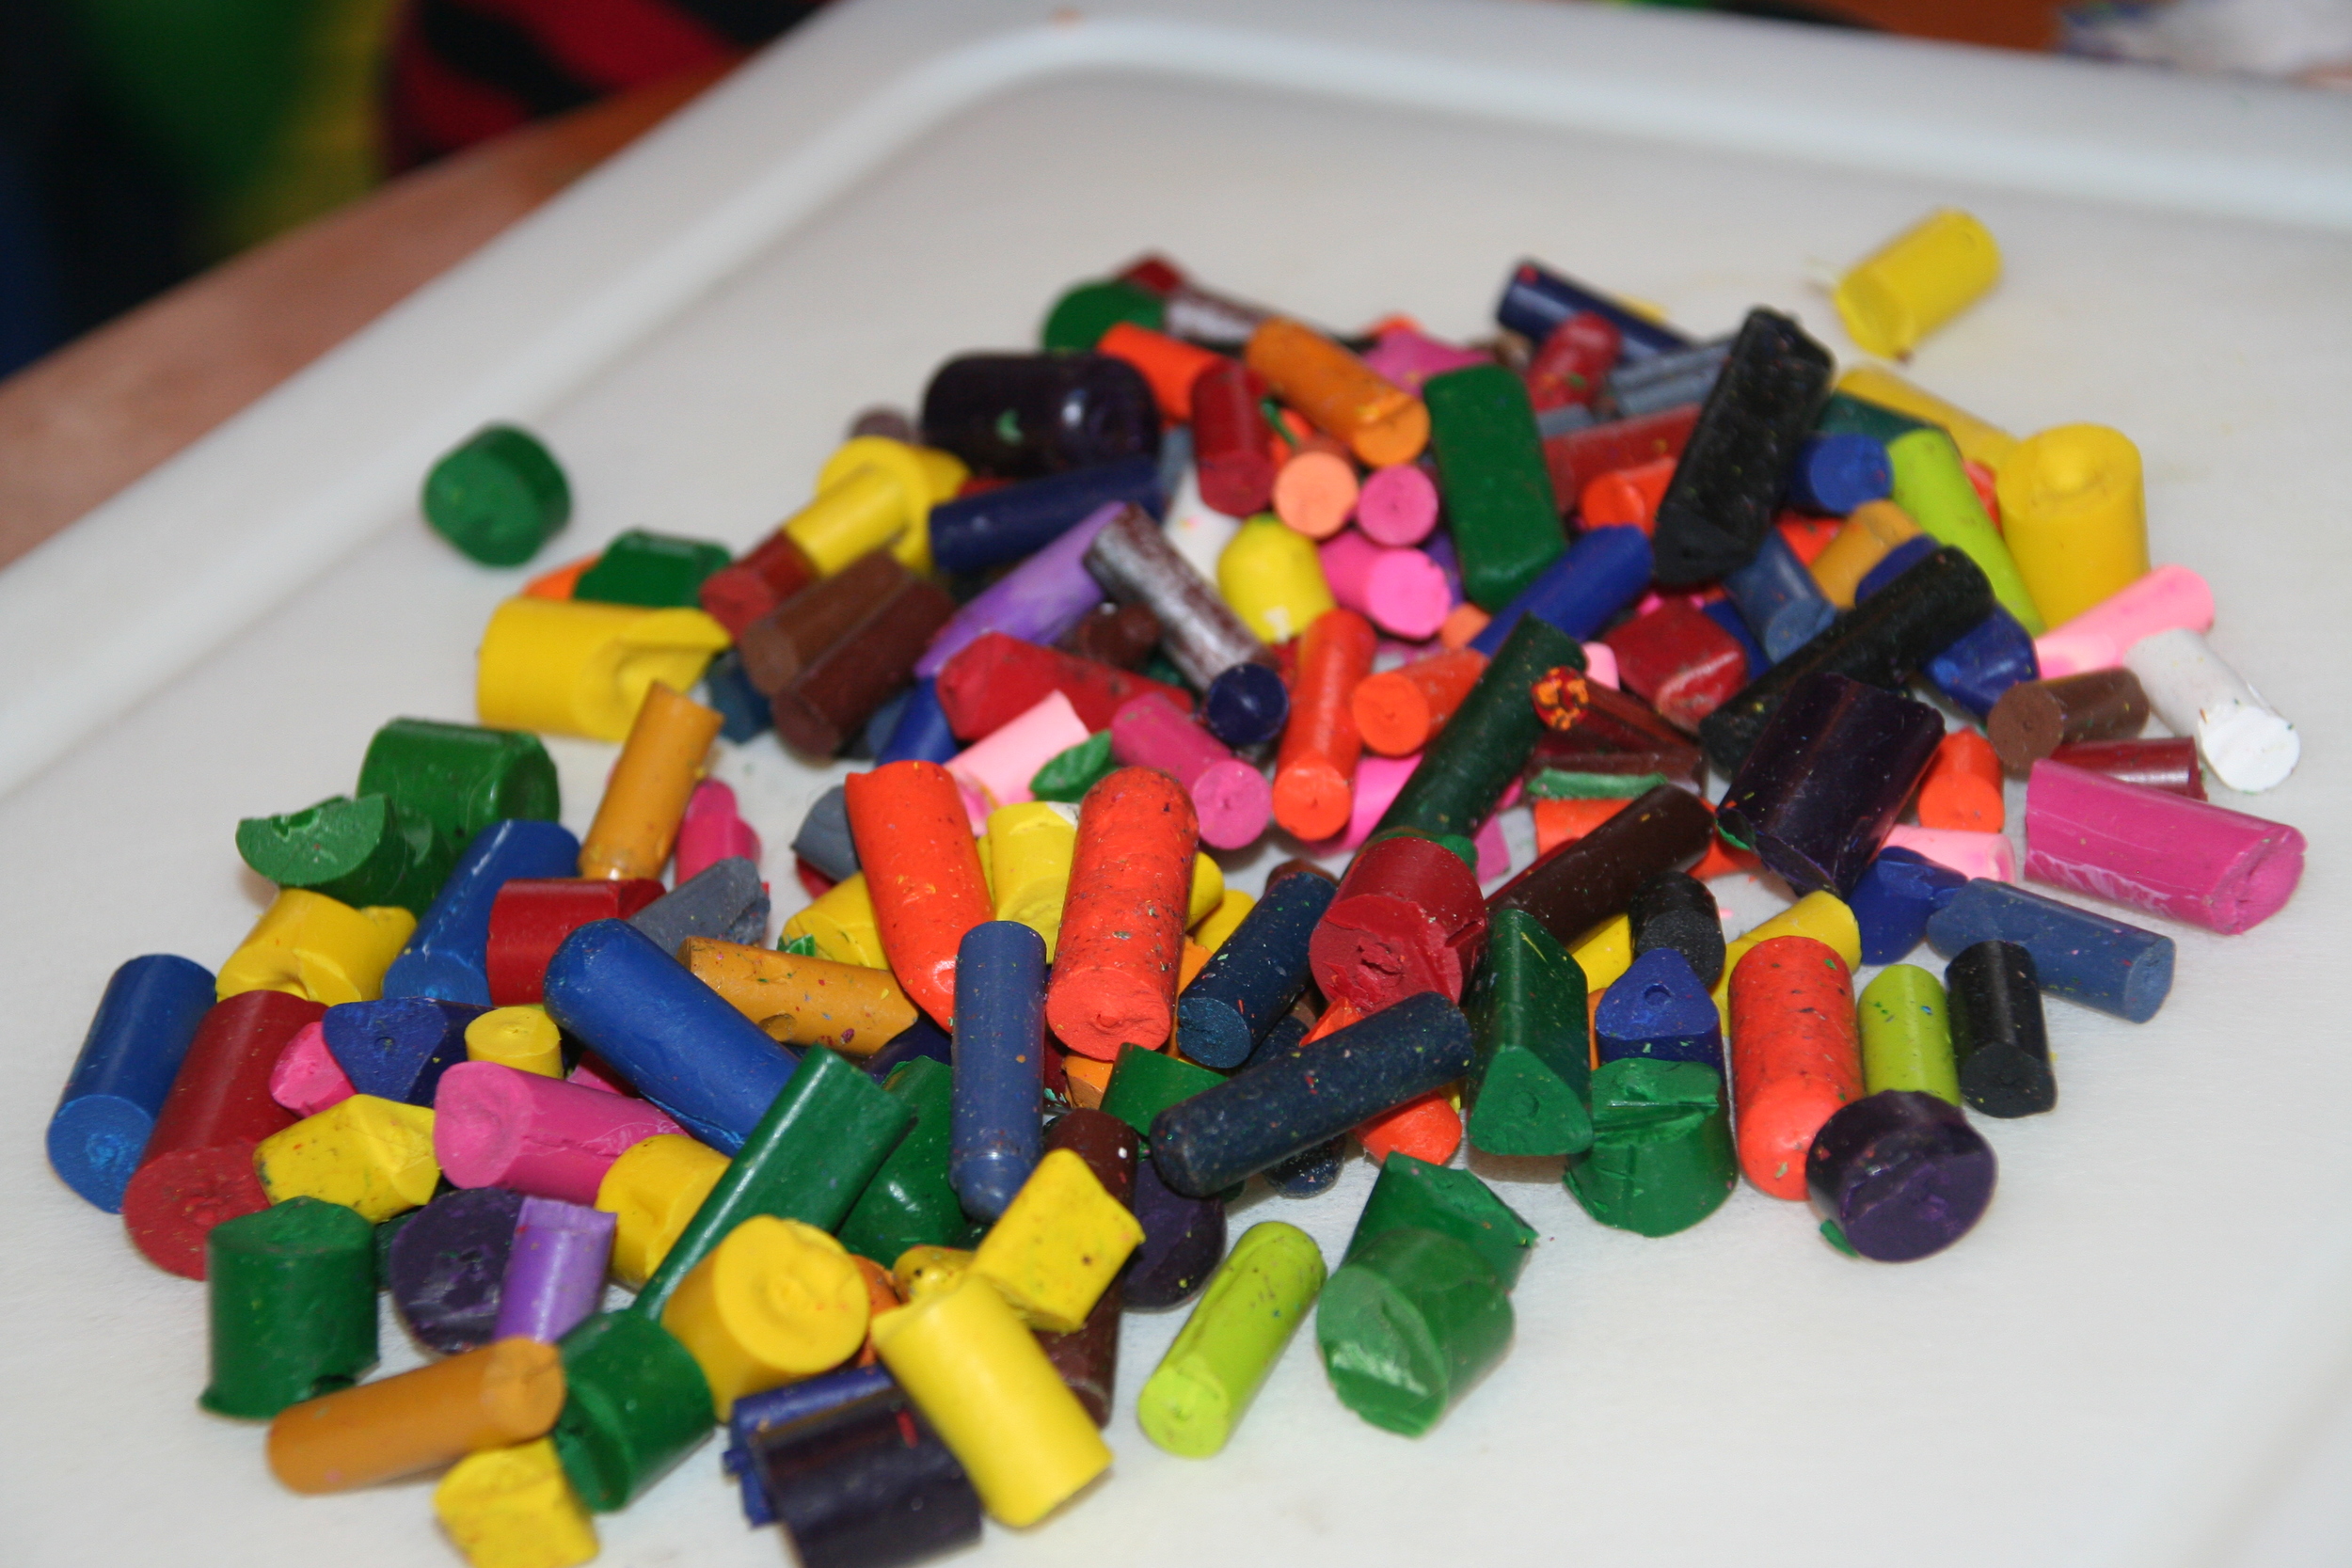
2. Use a large knife and chop the crayons into small pieces. Preheat the oven to 230 degrees. 

crayon2.JPG

3. Place the crayon pieces into a silicone baking dish (ours had mini squares but the one I saw on Pinterest had mini heart shapes).

crayon3.JPG

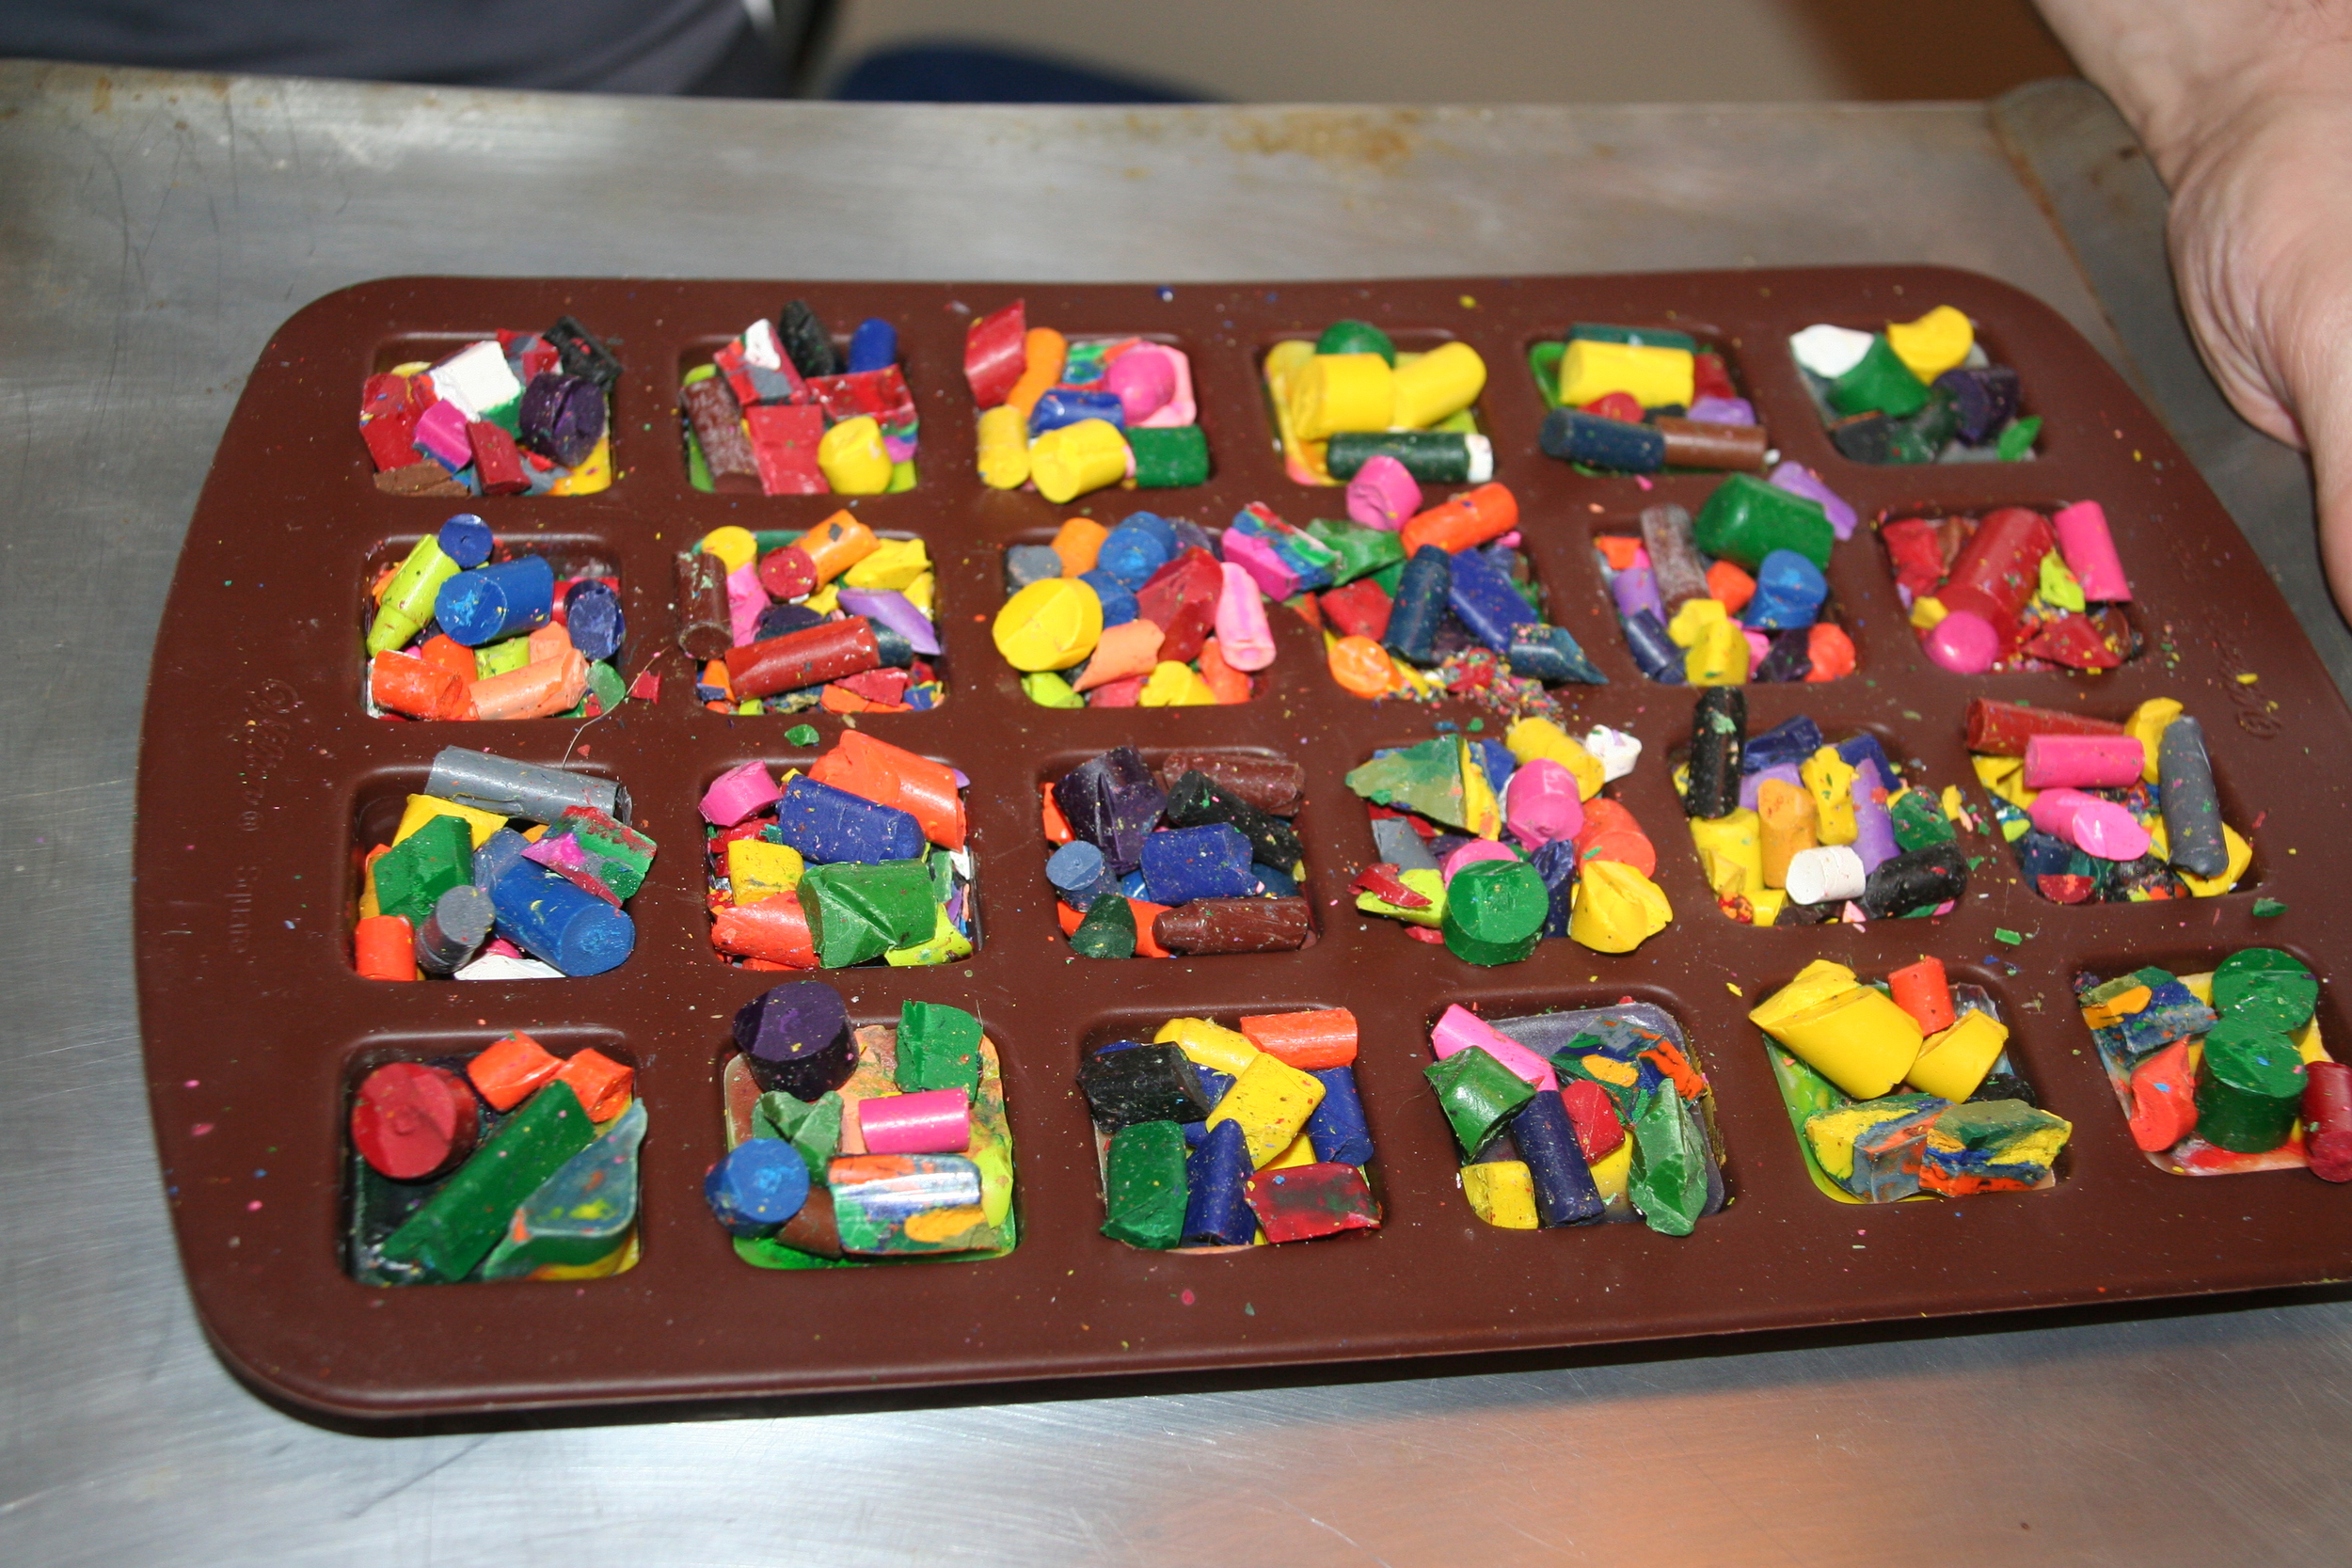
4. Bake at 230 degrees for 20 minutes and then set aside to cool for about one hour.  Be sure to place a cookie sheet underneath the pan to catch any melted crayon liquid. Voila! 

crayons final.jpg

White Bean Sage Dip

Having guests over for New Years Eve? Dips can be a quick and delicious addition to any celebratory table and many times, they're quite healthy too. I dont know about you but my kids are fond of dipping - though lately their go-to dip is ketchup. I'm hoping to broaden their dip horizons with this yummy white bean sage dip - and it literally took me 5 minutes to make. 

Best wishes for a happy new year!

White Bean Sage Dip

White Bean Sage Dip

White Bean Sage Dip

  • 1 can of great northern beans
  • 1 can of chick peas
  • 1 1/2 TB fresh sage 
  • 1 1/2 tsp salt (or to taste) 
  • juice of one lemon (or to taste) 
  • 1 TB olive oil
  • 1 clove of garlic (or to taste) 

Drain the beans. Add all ingredients and puree. I used a stick blender and it was done in 2 minutes. You can leave this slightly chunky or make it smooth, as I've done. Enjoy! 

Orange Mint Olive Oil Cookies

It worked!

I played around with the delicious recipe from Une Gamine Dans La Cuisine that I blogged about last week and the outcome is equally as yummy! I substituted orange zest and juice of an orange for lemon in the original recipe and also substituted fresh mint for fresh thyme (full recipe below). Voila: Orange Mint Olive Oil Cookies! 

Orange Mint Olive Oil Cookies

Orange Mint Olive Oil Cookies

My family can barely wait for them to cool before gobbling them up. If you're looking to bring cookies to a New Years party, look no further - these tasty cookies have a delicate cookie texture and an interesting flavor that nicely balances sweet and salt. Thank you again to Une Gamine Dans La Cuisine - the original source of this inspiration! 

ingredients
1 cup granulated sugar
2 Tablespoons orange zest (about 1 navel orange) {note: save the orange for the juice}
2 1/4 cups all-purpose flour
1 teaspoon baking powder
1/2 teaspoon baking soda
1/4 teaspoon salt
2 Tablespoons finely minced mint
2/3 cup virgin olive oil 
1 egg
1/2 teaspoon pure vanilla extract
3 Tablespoon fresh orange juice

topping
1/2 cup granulated sugar for rolling

method
In the bowl of a stand mixer, combine the sugar (1 cup) and lemon zest. Rub the zest into the sugar until it's evenly moistened and aromatic; Set aside to marinate for a few minutes.

In a separate large mixing bowl, whisk together the flour, baking powder, baking soda, salt, and mint; Set aside. 

Add the olive oil, egg, vanilla extract, and orange juice, to the orange-sugar mixture. Using the paddle attachment, beat on med-low speed until smooth. (About 3-5 minutes.) Add the dry ingredients and beat on med-low speed until just combined. Switch over to a large rubber spatula and use it to mix in any stray flour streaks. Cover the bowl and refrigerate for at least 3 hours. 

Preheat the oven to 375 F. Line cookie sheets with parchment paper. 

Place the 1/2 cup of granulated sugar (for rolling) into a large, shallow bowl. 

For each cookie, measure out about 2 well-rounded teaspoonfuls. Roll into balls and roll the balls through the bowl of sugar until evenly coated. {Note: Don't worry if the dough is a bit crumbly. If you work the balls of dough long enough with your palms, it will come together.} Place the sugar-coated cookies onto prepared sheets. Use the bottom of a glass or cup to flatten slightly.

Bake for 8-10 minutes. The cookies will have puffed up slightly but will still look pale. (Mine were just right after 8 minutes.) Remove the cookies sheets from the oven and let the cookies rest for about 3 minutes before transferring them to a cooling rack.

Recipe adapted from Mama's Gotta Bake

Easy Black Beans for a Rainy Hectic Day

I am having one of those days. I had a million things that needed to get done today and my babysitter called in sick. Ugh. And it's raining. After the work that I was supposed to get done today, I really wanted to spend some one on one time with my 6 year old daughter. Looks like I'lll be with all three kids today and with all the shuffling and whatnot that three kids demands, there's barely a moment to think about dinner. Must make something in advance that takes no time at all to serve later on.

Easy black beans

Easy black beans

Looks like we're having beans and rice for dinner. Yipee! I love beans and rice and I always forget how very easy it is to prepare. Plus on a crappy day, this can be just as comforting as soup but more manageable to eat for the little ones (I dont know about you, but my 2 year old is awful with soup and a spoon). As soon as I got the babysitter call this morning, I prepared these. My kids will be excited and I'm happy that despite the utter chaos of the day and total lack of time, they still get a healthful dinner that's loaded with colorful vegetables, protein and fiber. 

In addition to the rice that I made and set aside, here's how I prepared the beans:

  • 2 cans of black beans
  • 3 chopped carrots
  • 2 chopped stalks of celery
  • 1 chopped onion
  • 2 chopped poblano peppers (bell peppers work fine too)
  • 2 chopped cloves of garlic
  • 1 T  chili powder
  • 1 tsp cumin
  • 2 T white vinegar
  • 1/2 cup chopped fresh cilantro 
  • 1 T olive oil
  • Salt and pepper to taste.
  • Cayenne to taste

In a large pot, saute the onions and garlic in olive oil on medium heat until the onions are translucent, about 5 minutes. Add the peppers, carrots, celery, chili powder, cumin, salt and pepper and continue to saute for another 3-5 minutes. Make sure vegetables are evenly coated with spices. Add the beans and simmer for about 25 minutes, stirring occasionally. Add the white vinegar and taste for salt/pepper/cayenne preferences.  Add cilantro and stir to combine well. 

Serve plain or with rice. This recipe makes enough for my whole family plus leftovers for lunch tomorrow.

Win a LaLa Lunchbox Lunchbag!

Cute, eh?

IMG_0027.jpg

We're giving away three of them! Why? Because LaLa Lunchbox wants to make your New Year's Resolution to pack a better lunch a reality. 

Here's how you can win one of them: 
  • Like us on Facebook and post your favorite packed lunch to our wall (or your child's favorite) OR
  • Follow us on Twitter and tweet your favorite packed lunch (or your child's). Please include #lunchbagFTW

Easy peasy.

Enter until Tuesday, December 18 at 8pm EST. One entry per person. Tell your friends and family!
We'll pick three lucky winners via random drawing on December 19. Stay tuned!

Happy Holidays and best wishes for a healthy, happy new year from LaLa Lunchbox!