Here’s the dilemma: we teach our kids to eat slowly. To chew carefully. But in the school lunchroom, there’s hardly any time! The message becomes “eat faster!” It’s confusing, right?
The lunchroom is a social place. It’s the only time of day that the kids reliably have to just sit and chill and chat. At recess, they want to run around or play in some way. But the lunchroom is a different kind of socializing. It makes sense to me that the kids aren’t solely focused on the food. My kids have about 20 minutes for lunch, which has to include the actual eating, conversations, bathroom field trips and getting settled or packed up, That feels jam packed to me!
If your kid is a slow eater, nutrient dense options are your best friend. Here are three lunchbox ideas that are high on the satiation scale and easy to eat in a busy environment. If you’ve got others to share, let me know!
Banana Rollups
These are big on flavor and filling at the same time. It has an entire banana (loaded with potassium), plus nut or seed butter for protein rolled up in a tortilla to make it easy and fun to eat.
To make Banana Rollups:
Lay out a tortilla and spread a thin layer of your favorite seed or nut butter on the entire surface. Place a whole, peeled banana on the bottom edge. Roll up the tortilla and use the seed/nut butter to seal the rollup. Place seam side down and slice into pieces.

Banana Sunbutter Rollups
2. Egg Muffins
Eggs are one of my favorite foods to pack in lunchboxes. Make a batch of egg muffins with some veggies and you’ve got a hearty, filling, veggie loaded situation!
To make Egg Muffins:
Combine 10 lightly scrambled eggs with 2/3 cup chopped veggies (cut into very small pieces), salt to taste (I use 1/2 teaspoon) and (optional) 1/2 cup of shredded cheese. Spray a muffin tin with avocado or vegetable oil and bake these in a preheated 350 degree oven for 25 minutes (or until cooked through). Makes 12.
Options:
Season with 1/2 teaspoon of garlic or chili powder for extra flavor.
Add 2 tablespoons finely chopped herbs, such as parsley or cilantro for an added flavor boost.

Egg Muffins
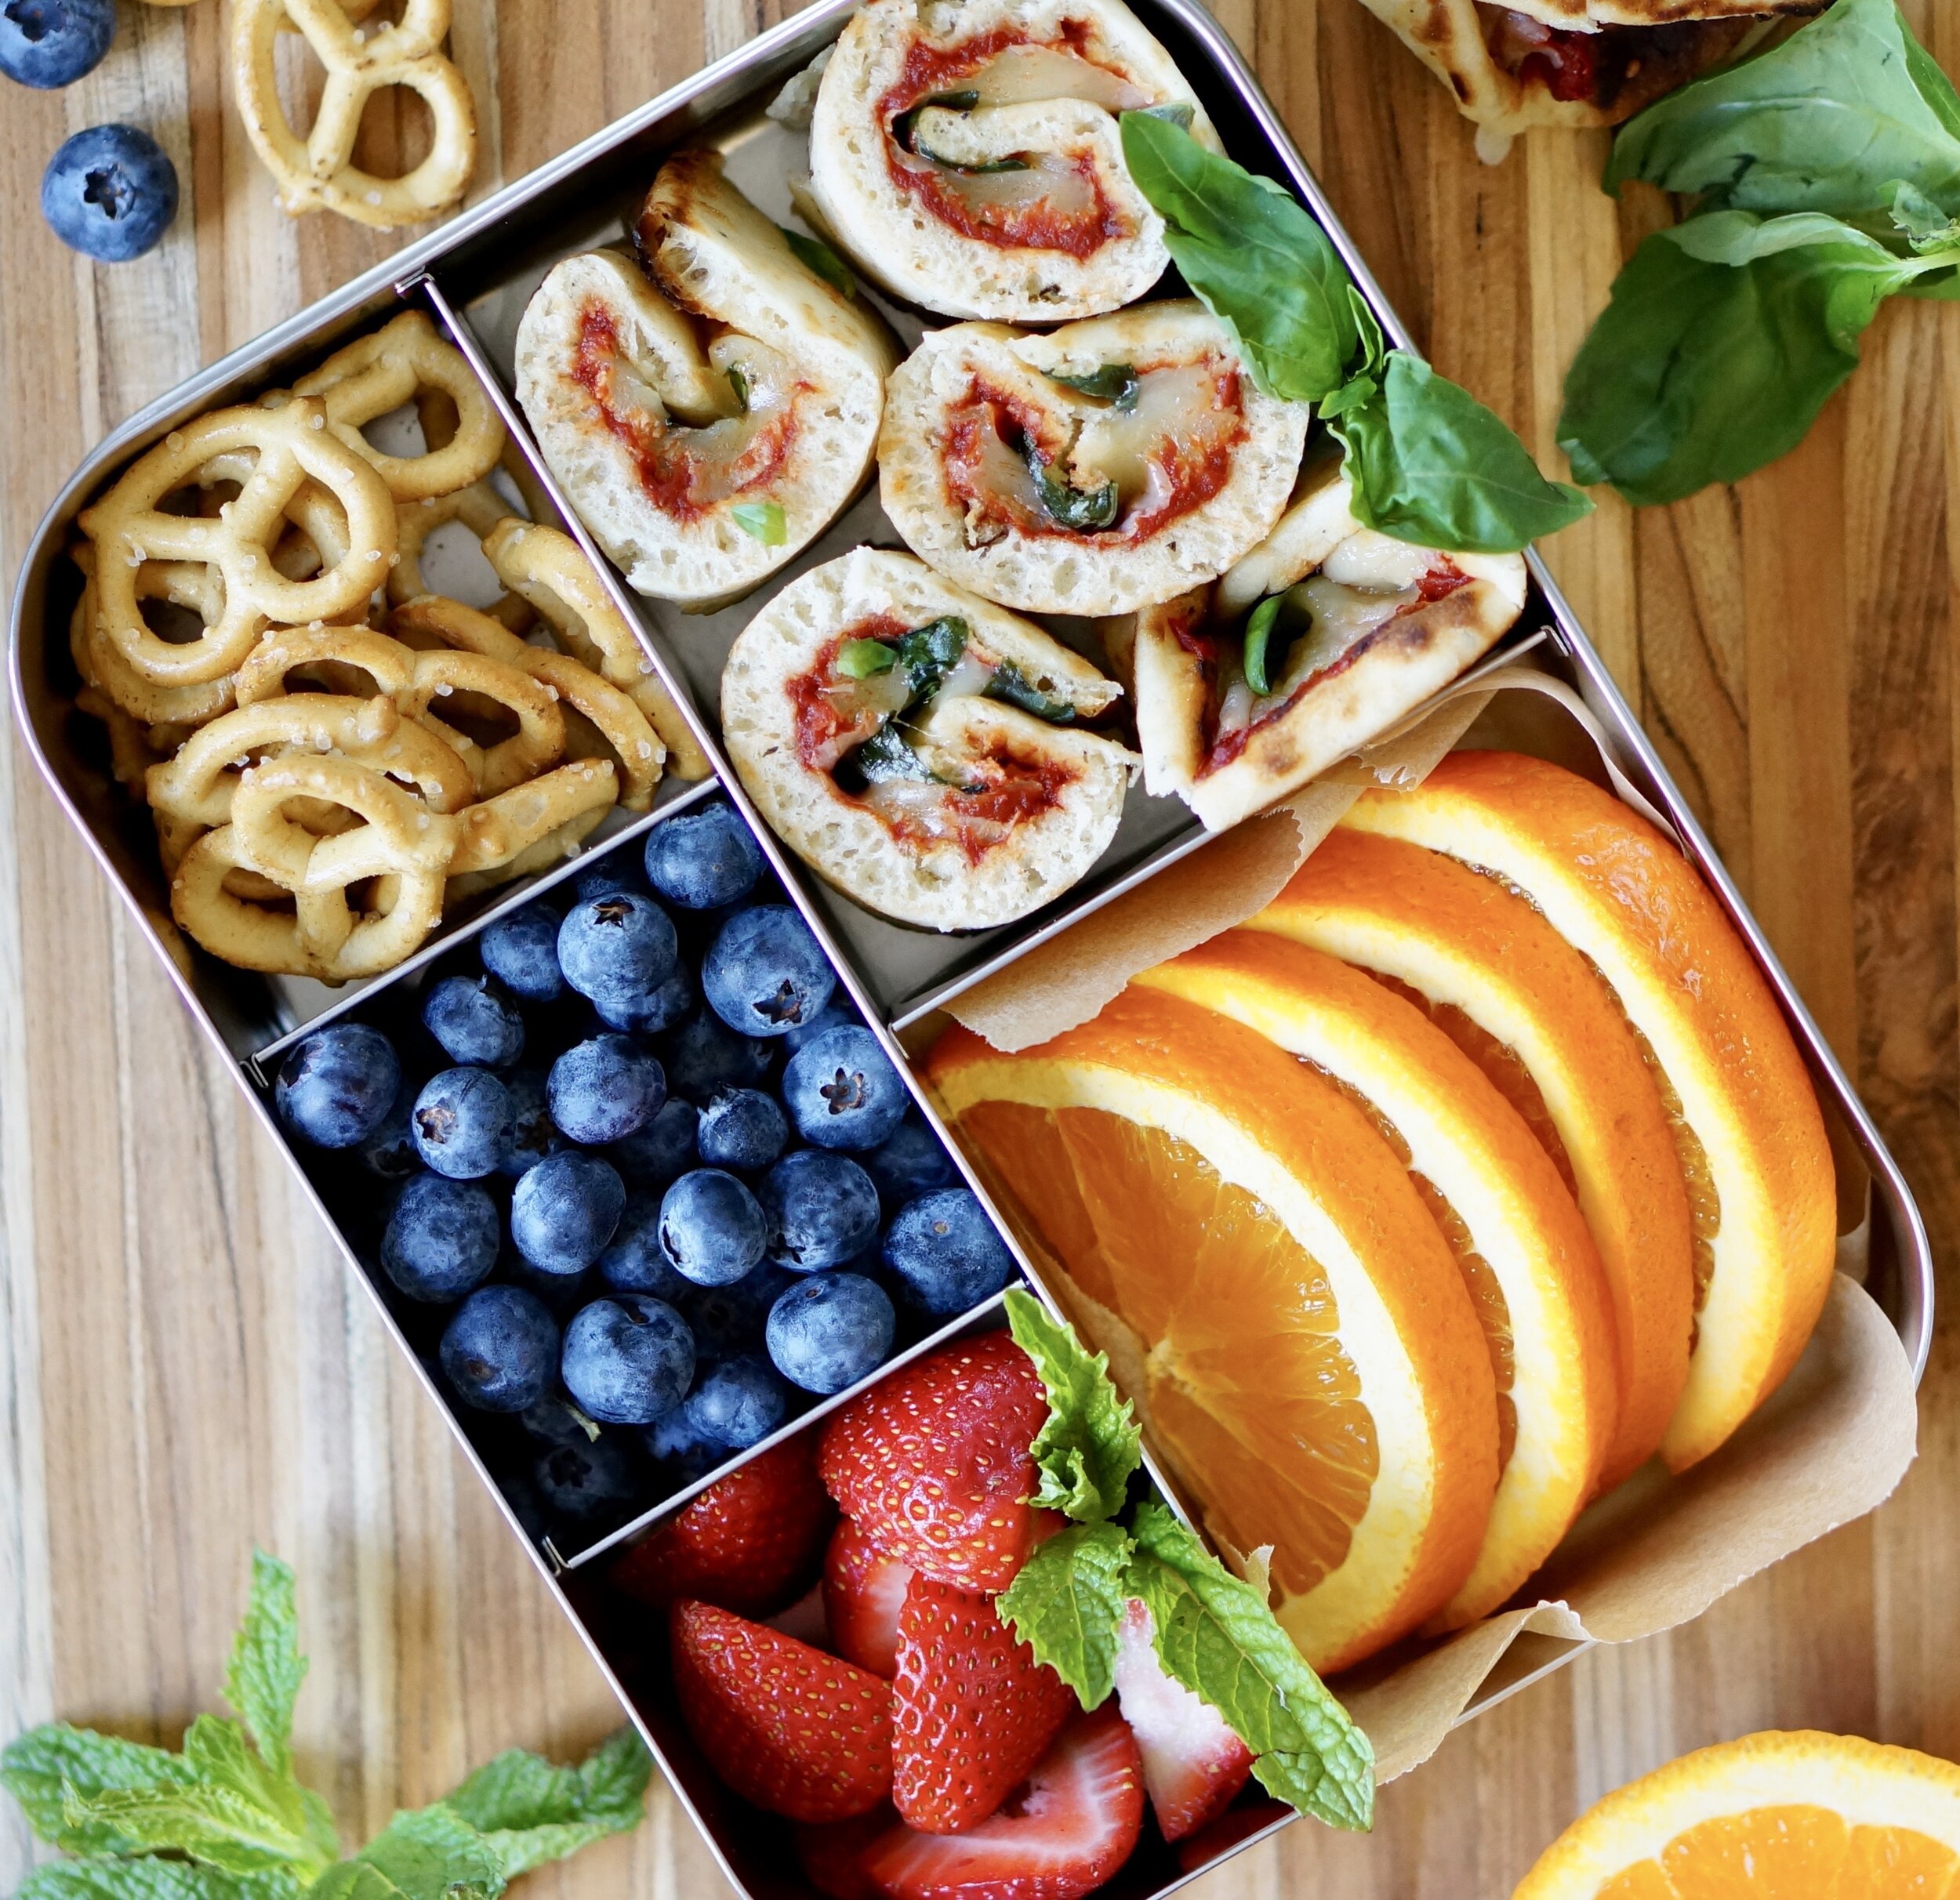
3. Pizza Rollups
I don’t know about you, but my kids inhale pizza. For my slower eater, pizza rollups are an insurance policy of sorts; Even if that’s the only thing that’s eaten, it’s got vitamin C from tomato paste, protein from cheese to keep them satiated, and carbs from the flatbread or naan to provide energy.
To make Pizza Rollups:
Lay naan or flatbread out on a baking sheet. Spread a thin layer of tomato paste. Note: I use tomato paste instead of sauce because it prevents sogginess. Sprinkle on shredded cheese and pop under the broiler for a minute or so, or until the cheese has melted. Optional: add fresh basil after removing from the oven. Let this sit for at least 5 minutes and then roll up and slice into pieces with a sharp knife.
If you make any of these and share them on Instagram, tag me @lalalunchbox #lalalunchbox
p.s. like these lunchboxes? Check them out on my Amazon shop.